
Products You May Like
As most coffee enthusiasts know all too well, drip brewers tend to multiply. You start with a Melitta
cone and then a kind relative gives you a CHEMEX as a gift. Wedges are great, but what about a flat-
bottomed brewer like a Kalita Wave or a NotNeutral Gino Dripper? And you are not really a true coffee
fanatic until you master the V60. Down the rabbit hole we all go, cluttering our cupboards along the
way.
Of course, it is a fun challenge to change up our morning brewing routines and reconsider, with
fresh eyes, the basic parameters of a pour over.
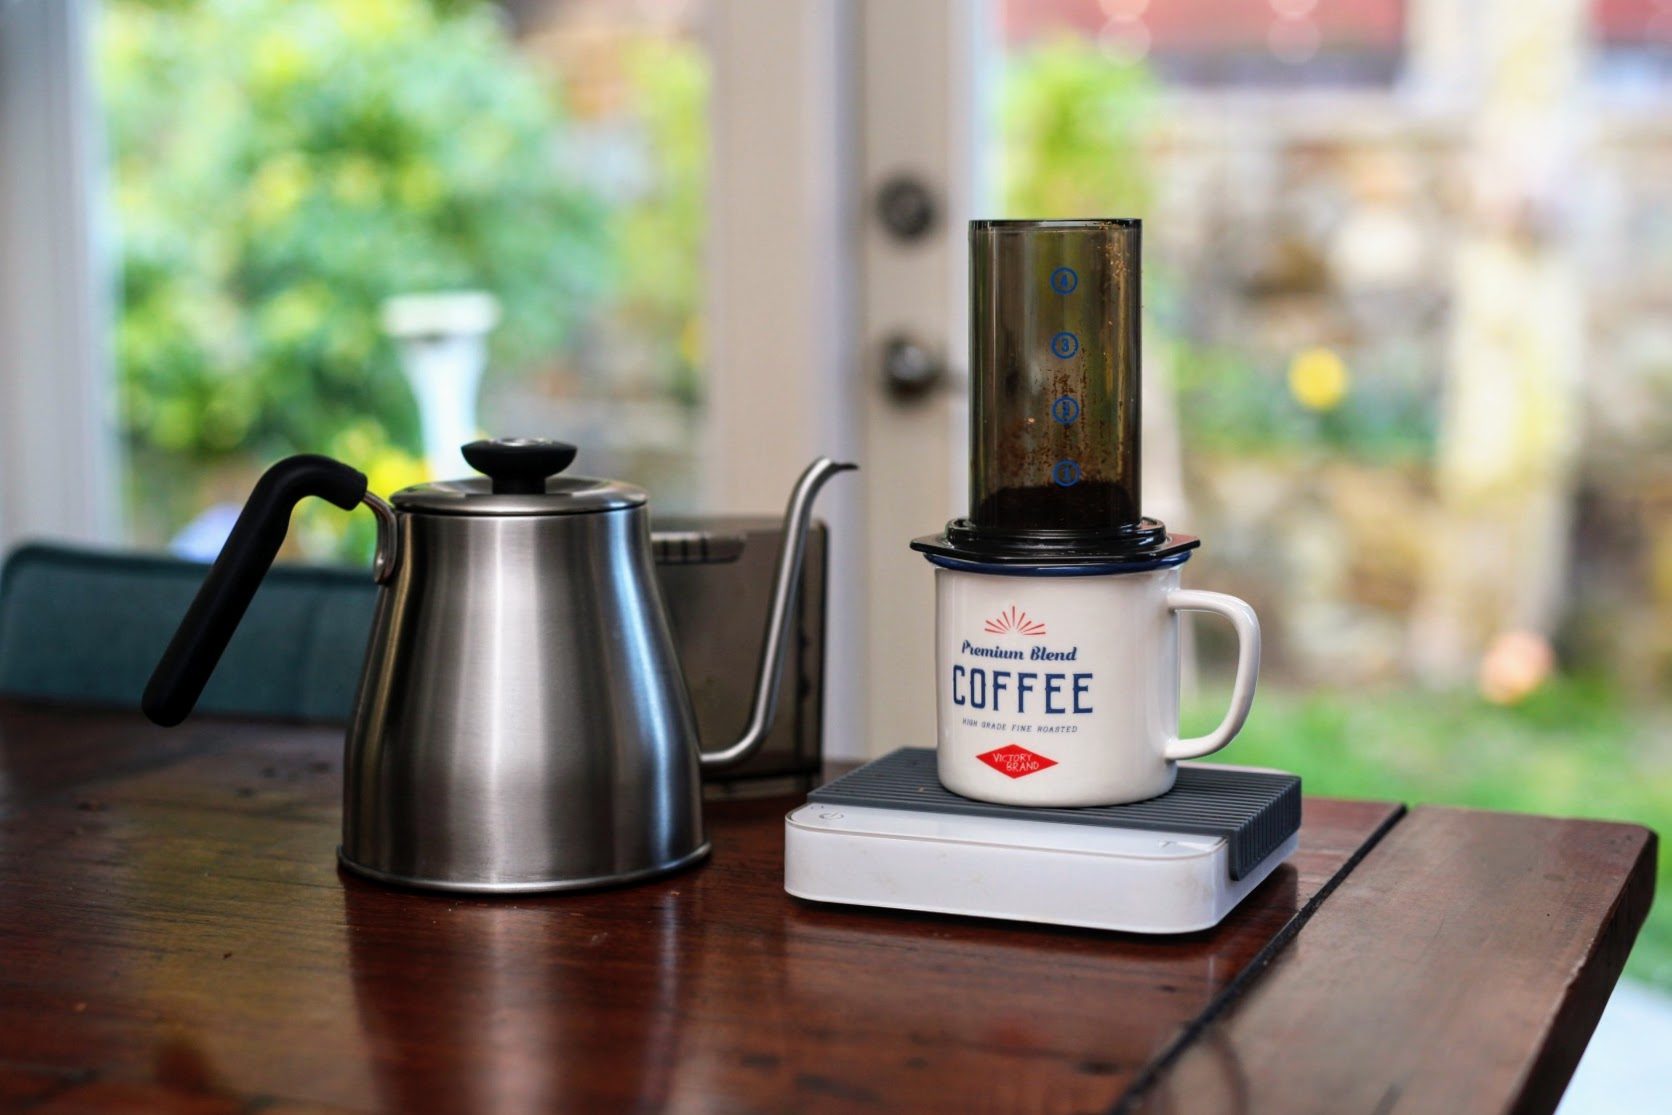
So, good news. If you are in the mood to test your skills on a new drip brewer, you might already have one on hand: the Aeropress. The Aeropress debuted in 2005 and was designed by the Alan Adler, the inventor of Aerobie flying ring (a wonderfully fantastic item in its own right, but sadly it does not brew coffee). If you are not familiar with the Aeropress, it is essentially an immersion brewer with a rubber-sealed piston that generates a small amount of pressure during the plunge. I will delve more into Aeropress specifics and brewing variations in other posts, but what is of interest to us at the moment is the body of the Aeropress, which a perfect cylinder.

Why would anyone use an Aeropress as a drip brewer (i.e., without the piston)? This brings us back to brewers like the Kalita or Gino Dripper. These are built on the premise that the flat bottom is more likely to keep channeling from occurring, thus providing a forgiving brewer with more even extraction. Unfortunately, the great problem with the Kalita Wave, and similar brewers with ridged filters, is that keeping your coffee on the bottom of the brewer, and not on the sides of the filter ridges, is quite a feat.
This is exactly the appeal of cylindrical brewers with disc filter at the bottom, like the Tricolate, as they offer a more even flow straight through the filter bed. Using an Aeropress to these ends has received some attention in the coffee-sphere of late. Take a quick look at the Sprometheus vlog and Coffee ad Astra for some interesting discussions.
I have been playing around with this for a while now, and here are some thoughts:
For my initial experiments, I dialed in a Kenya Nyeri Kiandu AB in a wedge brewer with 20g in and 300g out in about 3.5 minutes. This is a bright Kenya with a pleasant balance of citrus and spice character.
Out of curiosity I kept the same grind and ratio for the Aeropress run, but I scaled back the volume a bit with 15g in and 225g out. I did about a 20 second bloom with 30g of water and then adding the remaining 195. The total brew time was a surprisingly quick 7 minutes (I assumed it would take much longer); however, the resulting coffee was muddy overall, with a harsh metallic aftertaste.

I played around with coarser grinds in subsequent attempts and was able to get the brew time down to around 3.5 minutes. The cups I enjoyed most were ground a bit finer, but I stopped the brew at about 4 minutes and usually with only about 75% (about 170g) of the brew water run through. This method seemed to yield a reliably brighter cup. I also found that increasing the ratio of water to coffee helped with speed and flavor clarity. The pours with 12g in and just over 215 out were especially enjoyable, and this is likely the variation I would use more regularly.
What struck me most when experimenting with this method was in fact its consistency. I had the best luck changing the outcomes when I stopped the brew early. Changes to the grind and brew time were not so drastically reflected in taste, which seems to support the notion that flat bottom (and flat wall) brewers are more forgiving and uniform in results.
Based on all my trials so far, I found that 15 grams of coffee using 225 grams of brewing water, aiming for 3.5 minutes delivered the most interesting rests. The grind was roughly in-between my usual settings for pour overs and french press. My Vario has been adjusted to grind for espresso occasionally, but on its 10-point macro-step adjustment, I ground at a 7, which is just 2-3 steps courser than my pour over setting. Your numbers will be different, of course, but this should give you a sense of where to begin.
Am I donating all my other brewers after this experiment? No. But this is a really interesting exercise, and I highly recommend it to all. In addition to yielding a number of great cups of coffee, the experience also got me to play around with my standard pour over ratio, which I have not done in a while. This was a great reminder that all our morning coffee rituals should live, breath, and change—at least from time to time.
About the author

In addition to his day job, Alex has worked as a roaster in the industry off and on for years, all the while chasing the perfect shot of espresso.